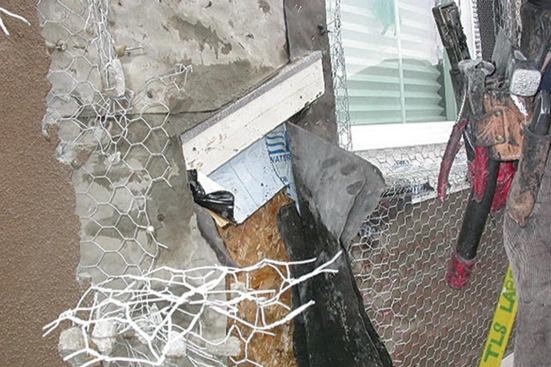
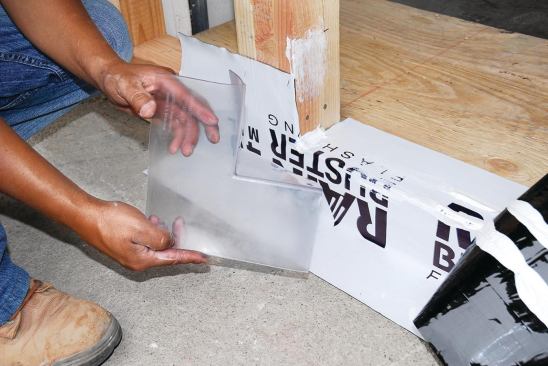
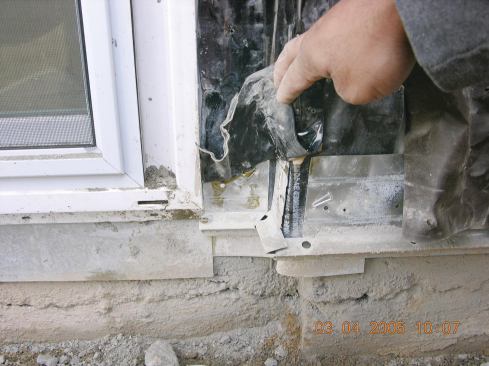
Shown here is a shutter block that was installed on top of a pie…
Shown here is a shutter block that was installed on top of a piece of light-blue self-adhered flashing. Unfortunately, the building paper was then installed on top of the flashing beneath the block, which allowed water to run behind the paper and soak the framing.
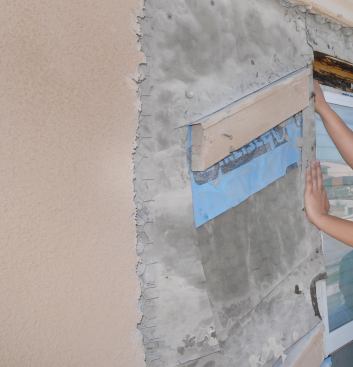
In the repair, the flashing membrane sits on top of the paper be…
In the repair, the flashing membrane sits on top of the paper below the block.
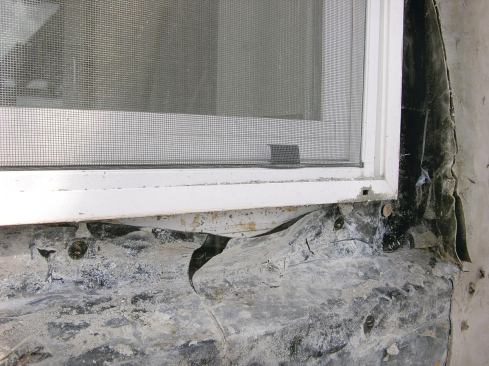
This window’s bottom flange was taped to the sheathing. Trappe…
This window’s bottom flange was taped to the sheathing. Trapped water caused the flashing membrane’s adhesive to fail, directing even more water into the framing.
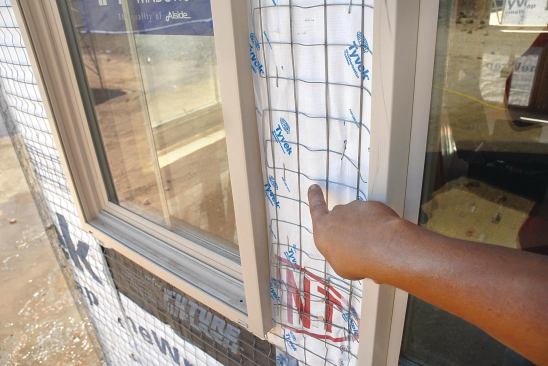
Wrinkles in the membranes can also create water paths underneath…
Wrinkles in the membranes can also create water paths underneath stucco, as in the wide sill of this recessed window.
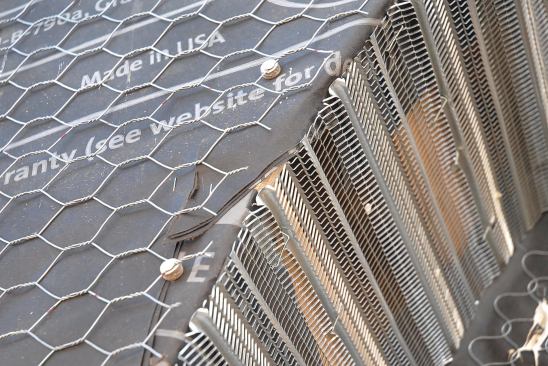
Prefabricated plastic corners …
and flashing tapes and membranes simplify window and door instal…
and flashing tapes and membranes simplify window and door installation.
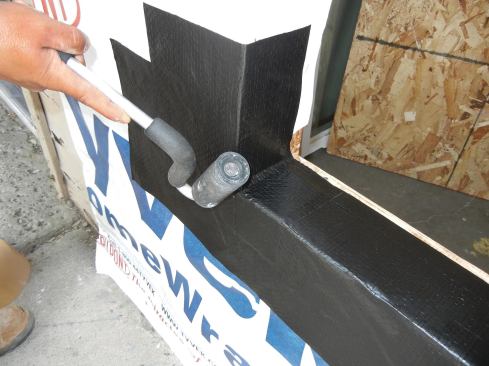
Always use a roller when installing self-adhering membranes, to …
Always use a roller when installing self-adhering membranes, to get rid of wrinkles.
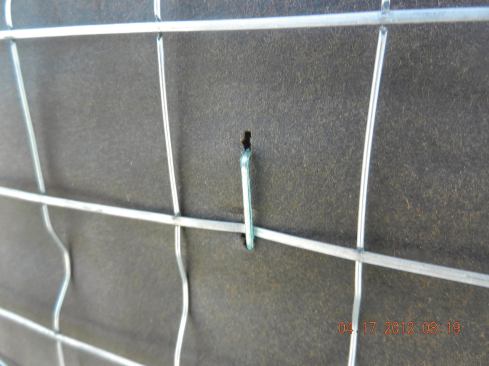
This wire lath has been installed backward; it should be positio…
This wire lath has been installed backward; it should be positioned so the ridges hold it away from the wall.
The author advises against using staples to attach lath, because…
The author advises against using staples to attach lath, because the holes they make in the building paper tend to become elongated.
Furring nails are preferable; they have a cork washer that holds…
Furring nails are preferable; they have a cork washer that holds the wire off the paper and also seals around the shank.
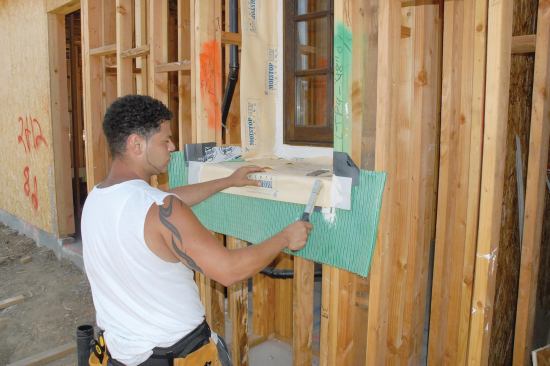
Stucco crews often use their hatchets to bend the lath in inside…
Stucco crews often use their hatchets to bend the lath in inside corners, ripping the building paper in the process. It’s a good idea to line corners with self-adhering membrane before installing the paper.
The open slits in the upper leg of this poorly installed weep sc…
The open slits in the upper leg of this poorly installed weep screed allowed water to soak the framing.
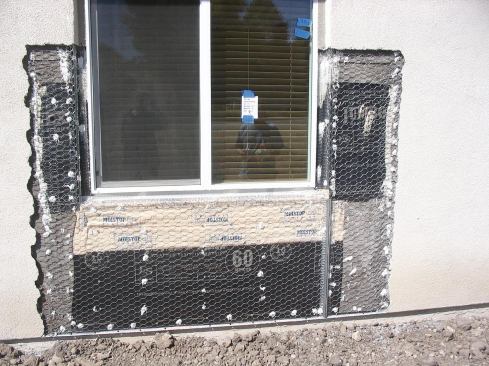
This wall has been repaired and is ready for stucco. The upper l…
This wall has been repaired and is ready for stucco. The upper leg of the screed is behind the building paper as it should be, but there is not enough clearance to grade.
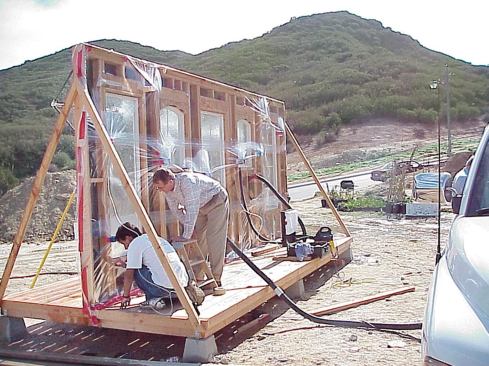
To find out how water and stucco interact, we built a 20-foot-long wall assembly and installed five windows in it (see photo, below). We used two layers of Jumbo Tex building paper over open-bay framing (no sheathing), and carefully applied the metal lath with furring nails driven by hand into the studs. We then applied three-coat stucco over the course of 10 days, moisture-curing both the scratch and the brown coat. From the back, we cut holes in the building paper to expose the scratch coat.
We set up our custom spray rack to apply water to the entire surface of the wall at once. In less than two minutes we found water flowing through the holes we had cut into the building paper — convincing us of the importance of creating a watertight envelope underneath stucco.
Three-coat stucco is the most common exterior cladding here in Southern California; properly installed, it’s tough, durable, and attractive. But it’s not waterproof. No matter how skilled the plasterer is, rain will get behind stucco.
My inspection business investigates moisture problems for several large builders in the region. Not a week goes by that we aren’t water-testing a stucco installation, typically looking for a suspected window leak. What we’ve learned is that the windows themselves are actually fairly weatherproof; more often than not, it’s the building paper and the flashing around the window that leak.
Get the Drainage Plane Right
Once you accept that the stucco itself lets water through, it’s easy to understand why the building envelope must be made watertight before the stucco is applied. In my experience, it doesn’t really matter whether the walls are covered with housewrap or Grade D 60-minute paper, as long as you use two layers. The first layer — the one against the sheathing — acts as the drainage plane, while the top layer is sacrificial and protects the bottom layer from construction damage. Even when the stucco actually sticks to the top layer, water can still drain out of the assembly.
I always recommend 60-minute Grade D building paper as the first layer; when it gets wet, it plumps up, which helps to seal around penetrations from lath fasteners. I prefer Fortifiber’s Super Jumbo Tex (800/773-4777, fortifiber.com) because of its consistently reliable quality. Other brands seem to work well too, as long as the paper is actually 60-minute paper. Codes require only that it be Grade D paper, so unless you actually specify 60-minute, you may end up with less-expensive 30-minute or even 10-minute paper.
Regardless of which water-resistive barrier you choose, it’s only as good as the installation. I still see builders cover the rough window opening with housewrap, cut an X, then pull the wrap into the opening on all four sides before setting the window. I guarantee this installation will leak. The flap of housewrap above the window must be held up temporarily until the window is installed and flashed, then pulled down over the window flashing and taped into place (see illustration). I also commonly find reverse laps in the building paper, especially under windows and under shutter blocks, which are the pieces of wood nailed up for securing decorative shutters.
Be sure to follow minimum overlap requirements for the building paper, which by code are 6 inches vertically and 2 inches horizontally. I’d rather see at least 8 inches vertically and 4 inches horizontally; it’s cheap insurance.
Nine Tips for Better Stucco
1. Never measure sand by the shovelful. Shovels aren’t uniformly sized, and neither are tradesmen. One guy may throw in 8 pounds of sand with his shovel, while another guy might throw 5 pounds. Instead, make a box to measure out the ingredients — one cubic foot is a good size.
2. Always mix per the manufacturer’s instructions.
3. Use clean sand; this makes a big difference in stucco quality.
4. Use premixed stucco. Besides eliminating the risk of a bad mix, you make the supplier at least partly liable if problems develop.
5. Moisture-cure the stucco. The scratch coat should measure 3/8 inch thick, and it should moisture-cure for 48 hours before the brown coat is applied. In dry climates or windy weather, keeping the stucco moist during the curing period may require more frequent wetting.
6. Allow another 48 hours to moisture-cure the brown coat, which should also be 3/8 inch thick (or per the manufacturer’s recommendations). Then let it dry-cure for 10 days (even though most manufacturers require only five days). Extra curing time minimizes cracking, which helps reduce water intrusion.
7. The color coat should measure at least 1/8 inch thick, and the final assembly should measure no less than 7/8 inch thick. Some codes may only require a total 3/4-inch thickness, but that’s too thin and will lead to cracking.
8. Don’t obstruct the weep screed at the base of the wall with paint.
9. Don’t use elastomeric paint as a remedy for leaks; testing shows that it won’t work.
Flashing Tips
Another mistake we often find around windows is that self-adhering flashing tape has been applied over the bottom nailing fin. Water that leaks in around the window frame gets trapped behind the flashing and causes the adhesive to fail. Instead of sealing water out, the failed membrane actually channels water into the wall cavity.
We’ve tested various flashing products to see how they behave under field conditions, and have had good results with Fortifiber’s Moistop neXT and Fortiflash, DuPont’s FlexWrap and StraightFlash, Rainbuster 415 and 420 (800/473-1617, topindustrial.com), and OSI Winteq TeQ:Flash cold-weather butyl flashing paper (800/624-7767, osipro.com). Some of these products require primers under certain conditions, so be sure to follow the directions. We’ve found that even when not required, a primer can often improve adhesion. I also recommend manufactured flashing corners, like the Rainbuster 425.
Electrical and plumbing penetrations. Many builders will just plug small openings with sealant, which often fails over time. For more reliable results, we recommend QuickFlash flashing panels (800/963-6886, quickflashproducts.com), which are specifically sized for different types of electrical boxes, light fixtures, and plumbing/hvac pipes. These products are easy to install and not terribly expensive, but need to be ordered in advance.
Lath Lessons
Some contractors fasten metal lath to the wall with pneumatic staples, but we’ve found that this can cause problems. For one thing, a staple has two prongs, so it creates twice as many penetrations as a nail. Furring nails are preferable; they have a small cork washer that helps space the lath away from the wall and also seals around the nail.. Take the time to ensure that every furring nail is perpendicular to the wall, and that the cork is compressed against the sheathing.
When nailing up lath wire, a good rule of thumb is to keep furring nails three fingers away from windows and doors. This ensures that you don’t damage the nailing fins.
Corners. At inside corners, the stucco crew often use their hatchets to bend the lath. As a result, we often find tears in the building paper. Preformed inside corners like Cornerite are a good solution to this problem.
Screeds
To allow water to escape, the base of the wall should always terminate with a metal screed. There are two basic types: the kind with weep holes and the kind without. I prefer screeds with holes, because for many years I’ve seen them work effectively..
In high-wind areas — second-floor decks overlooking the ocean, for example — it’s a good idea to flash the screed’s nail fin with a 9- to 12-inch-wide strip of self-adhering flashing paper, such as RainBuster 415, Fortiflash Butyl, or DuPont Straight Flash. This will provide extra protection against water blown up into the wall in a driving rain.
Be careful not to paint over the seam where the metal and the stucco meet, especially with an elastomeric paint. This will simply block the escape route for any water that gets behind the stucco. Unfortunately, I also commonly see metal screeds that have been buried behind patio paving or landscaping. At minimum, code requires 2 inches of clearance between the screed and a walking surface, and 4 inches of clearance above the ground.
Gene Summy owns TLS Laboratories in Laguna Niguel, Calif.
Gene Summy is a contractor and building inspector in Laguna Niguel, Calif. His company, TLS Laboratories, specializes in solving exterior water management problems.