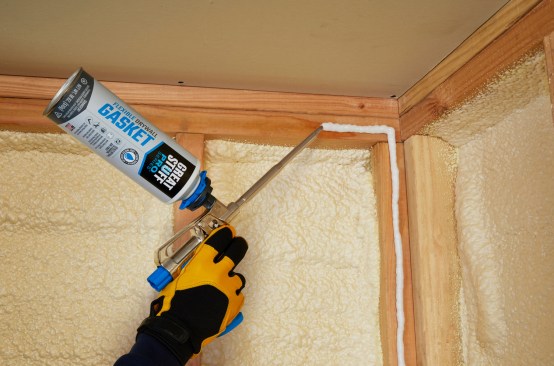
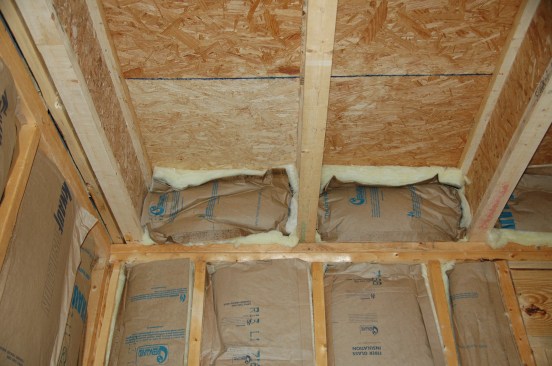
Duct boots should be carefully sealed using foam sealant.
In my work as a home building consultant, I often find myself training builders and crews about the importance of airtight construction. The new energy code mandates blower-door verification for homes, with a maximum 3 ACH50 in climate zones 3 to 8. If you fail the test, you’ll have to call your crews back in to air-seal as a retrofit. Three ACH50 is a tough mark for some builders to get to from the previous requirement of 7 ACH50. But there are good reasons for builders to focus on airtightness.
As much as a third of a home’s heating and cooling bills can be traced to air infiltration and exfiltration. So tightening up a house is an important step in energy efficiency. But that’s not the only reason airtightness matters. In addition, air leaks bring warm, humid air into contact with cold surfaces. That creates conditions ripe for mold growth and decay. And of course, drafts in homes are a comfort issue that can lead to homeowner complaints. Some people mistakenly believe that air leaks help walls dry out, but it’s the opposite, as the leaking air is almost always warmer and wetter than the air it’s driven to. In my experience, the biggest cause of water-related damage in buildings is from water leaks from the outside, and the second is damage due to air leakage. Tighter is better as far as managing moisture to prevent rot and decay.
Here, an air leak has led to condensation and severe moisture damage.
Air leaks in the building shell can be costly and difficult to fix after the fact. But air-sealing a new home under construction should only take a few hours. Let’s look at the low-hanging fruit—the simple approaches that will help you hit 3 ACH50 the first time out.
Attic First
For an air leak to occur, you need to have a hole and a pressure difference. Pressure differences are caused by wind, stack pressure, and HVAC equipment. Yep, duct leakage creates pressure differences across the envelope that drive moisture, so seal and test your ducts.
Fewer holes mean less leakage. Attics are particularly prone to losses from stack effect, which effectively turns a house into a drafting chimney (hence “chimney effect” is a synonym for “stack effect”). Air leaks at the top tend to be the most numerous and the easiest to remedy, making the attic the first place to focus on.
I recently air-sealed a 3,300-square-foot house built in 1978 (a two-story over a crawlspace). Because the house had a family of bats in the attic, all the attic insulation had to be removed. This was a perfect opportunity to air-seal. By sealing only the attic leaks, we cut the whole house air leakage rate from 4,460 cfm to 2,180 cfm—more than half the total air leakage.
Conscientiously air-sealing the attic ceiling after the drywall is hung—before insulation—makes getting to 3 ACH50 much easier. It doesn’t have to interrupt the sequence of the job, and it can be done with minimal cost. More production builders need to take this step.
Wall Plates and Ceiling Drywall
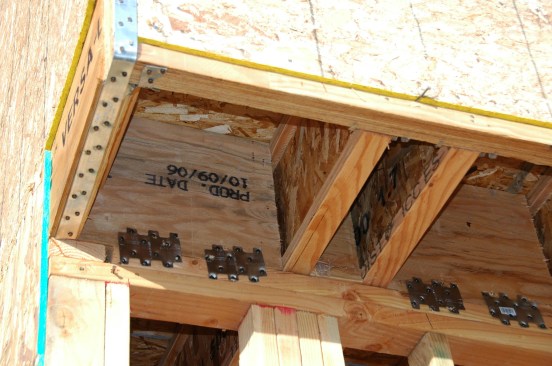
What does sealing the attic entail? It means identifying the big leak areas and addressing them. At the top of the list are wall plates. Partition and exterior walls are typically framed with truss chords fastened to the top plates. Once the ceilings are hung with drywall, you generally end up with hundreds of feet of cracks on either side of the top plates open to the attic. These can leak up .7 cfm per linear foot. Each stud bay in the partition effectively becomes a little chimney. Stack effect draws in air at the bottom of the wall plates and pushes it out the cracks into attics. Holes for electrical wiring, plumbing vents, and ductwork boots compound the leakage. One practical way to address this leak point is to send in a spray-foam contractor to hit just the leak areas
(see “Air-Sealing the Lid,” JLC, August 2019).
Partition wall plates are a big leak point at the attic floor plane. Drilled holes for wires make the problem worse.
Here, the wall plate joint has been sealed with foam.
DuPont
An alternative to air-sealing from above is to seal the drywall to the plate.
Can Lights
Of all the openings in a house, one of the biggest from an air-leakage perspective is around recessed light fixtures. In one study, can lights accounted for an average of 9.1 CFM50, or about 0.15 to 0.31 ACH50, per fixture. Conventional recessed cans are so leaky, you can see right through them. Surprisingly, many so-called “airtight, IC-rated” fixtures (which is what the energy code requires) are not much better. One Owens Corning study found they leak .9 cfm per light.
Better from an air-sealing perspective (and arguably from a lighting perspective, as well) are a range of new LED “can-less” fixtures that either have a low-profile housing or are surface mounted. Both types have simple plug-and-play-type wire connections that not only simplify the installation but result in almost no penetrations. (Consult the LED manufacturer for specific recommendations regarding insulation contact.)
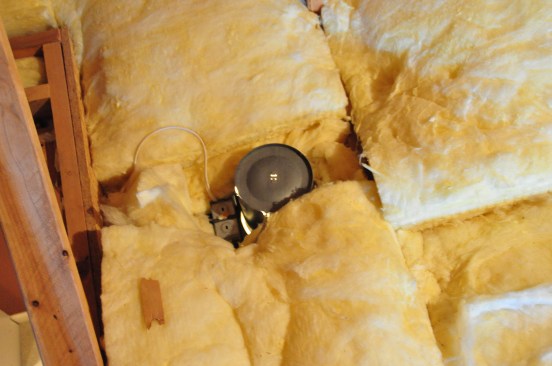
Recessed light fixtures are a major source of air leaks into attics. Here, light is shining up through the can light from below.
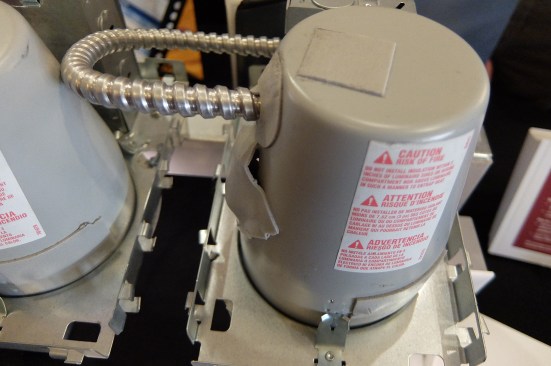
Even IC-rated can lights like this unit may have significant leaks.
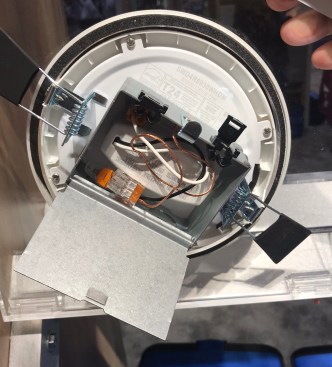
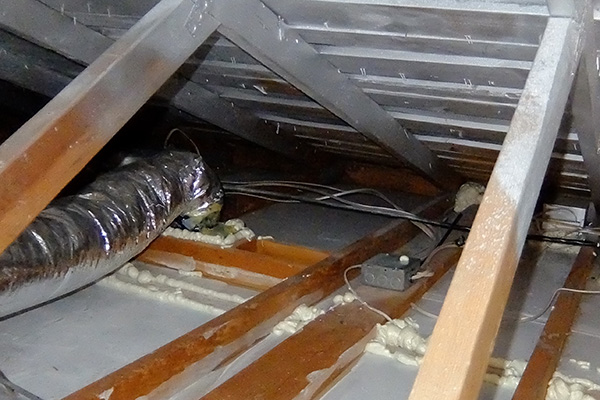
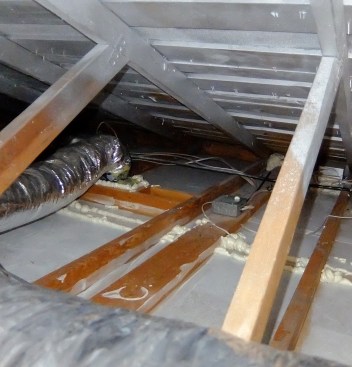
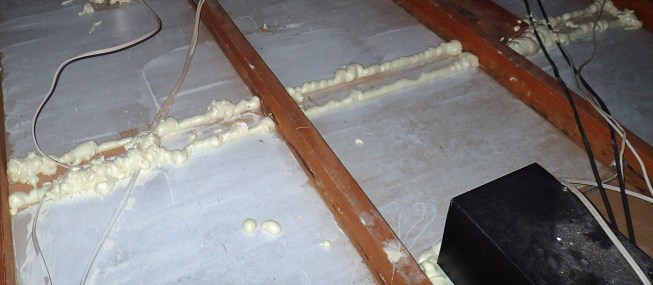
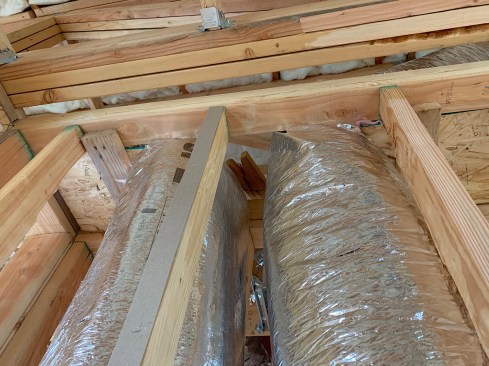
Duct Terminations
Duct boots at the end of HVAC supply runs through the attic are another big ceiling penetration from an air-sealing perspective. Carefully applying foam sealant to the perimeter of the boot and the drywall tends to be the easiest way to seal these leaks.
Caulking the perimeter of the duct boot prevents air leakage.
Knee Walls
Knee-wall areas and the floor and roof sections outside attic trusses are protected from weather, but otherwise are “open” to outside. The best way to deal with these enormous leaks is with rigid foam or heavy cardboard sheathing (even building wraps can work). It is picky work to piece-in these sheet goods and foam or tape the edges. But if not done, the impact on performance can lead to costly warranty issues. (For more on this, see “Fixing the Bonus Room,” JLC, March 2017.)
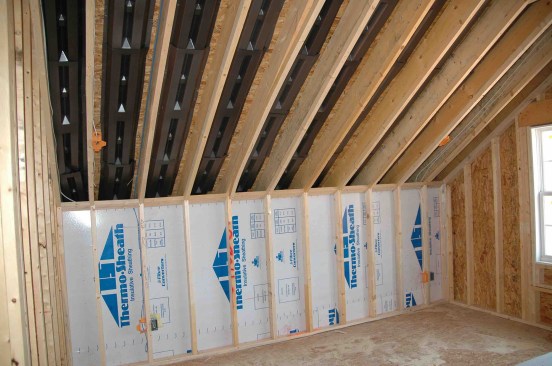
Sheet goods applied to the knee wall prevent a major air leak.
Attached Garages
Attics often have other huge openings that many builders don’t see as air leaks. A common one occurs in the ceilings of single-story attached garages where they bump up and connect to a larger attic space over the main house, or to a two-story wall. The best way to shut these huge leaks off is to apply sheathing or air-barrier material over them at the framing stage. Otherwise, you will need to go in later and cut pieces of rigid foam to block off the areas between the truss chords, and then seal the edges with foam sealant.
The juncture between a garage roof and an attic space should be sheathed over before the trusses are set.
Soffits
Dropped ceilings above cabinets are often left open to the attic floor. The exterior wall gets insulated, and often the insulation contractor will lay a batt over the opening in the attic floor, but underneath that insulation is just one big hole to the unconditioned attic, which is effectively outside.
The most effective way to seal these areas is by installing the ceiling drywall before framing out the soffits. A continuous drywall lid over the area effectively shuts down the airflow, whereas drywall that gets pieced on the sides and bottom of the soffits doesn’t. There are too many cracks at the soffit corners that corner bead and drywall mud don’t seal.
Cabinet soffits represent a significant source of air leaks.

Installing drywall at the soffit location before attaching the soffit creates an effective air seal.
Not every builder can get the drywall contractor on board to hang the whole ceiling early in the schedule, but you may be able to get the pick-up framing crew to install a few selective sheets of drywall over the soffit area. It’s not much drywall compared with the entire ceiling. Having the pick-up crew install these few sheets may not be as disruptive as you might imagine.
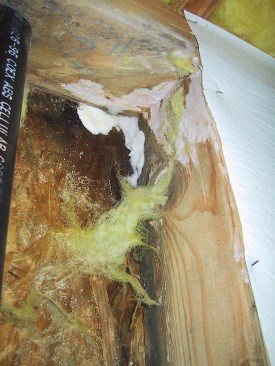
Bottom Plates and Band Joists
Beyond the attic, there remains a host of wall air leaks on which builders can focus attention to produce a significant reduction in total leakage area. Plate-to-floor connections and band-joist areas are often poorly sealed. I’ve learned you need to seal both the sheathing-to-plate connection and the plate-to-floor connection.
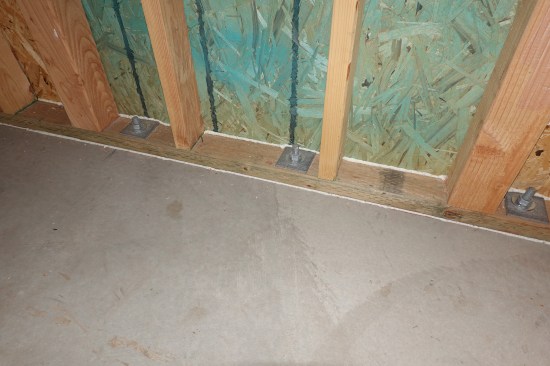
Sole plates should be sealed to the floor and to the sheathing.

Sole plates at the base of walls are a significant leak point. Even the wall between the garage and the main house should be sealed at this location.
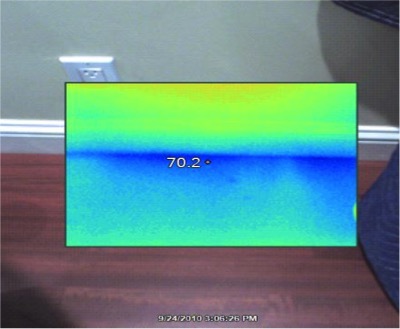
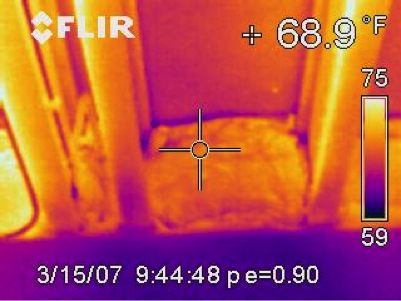
The infrared camera captures this view of air leakage at the base of a wall during a blower-door test.

Here, wind-washing has pushed cold air several feet up the inside face of an exterior wall.
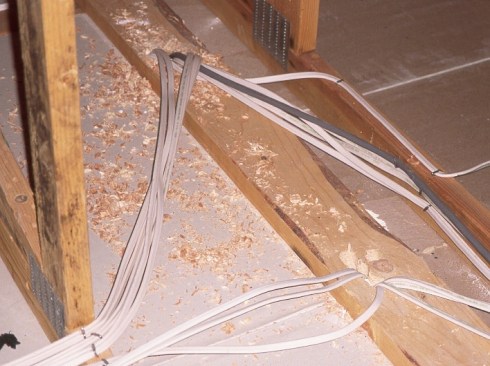
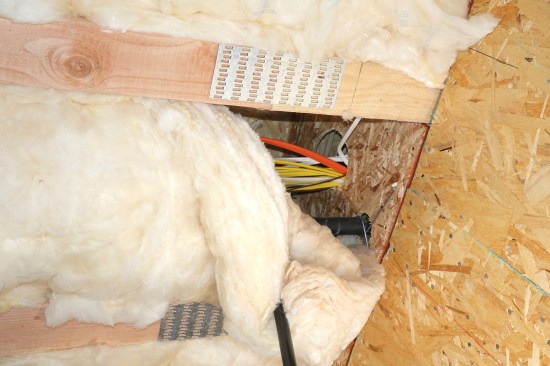
Band joists for second floors fall closer to the neutral pressure plane—the middle section of a building’s height—and therefore, they do not tend to be as affected by stack pressures. Nevertheless, they are still extremely leaky owing to the number of cracks formed by the pieces joining in this area.
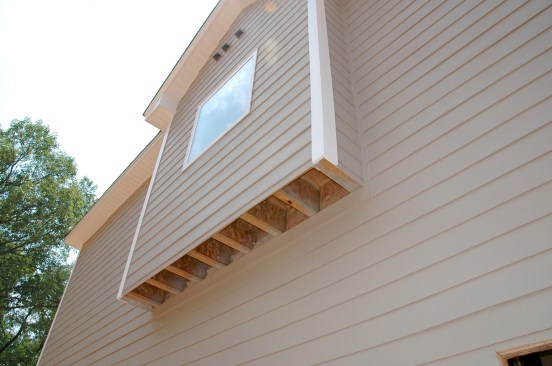
This cantilevered joist system is full of holes that would be troublesome to seal as a callback (see closeup, below).
Steve Easley
Some builders continue to believe that stuffing the rim with fiberglass is sufficient. Batts may work to insulate this area, but you first need to air-seal with caulk in the corners at the top and the bottom of the rim joists (the corner between the sill or wall plate and the top-side decking), as well as along the joists or floor trusses crossing the sill plate.
This is awkward work, to say the least. Getting between the floor joists and the decking is difficult. Some framing crews have gotten skilled at handling a caulk gun as they frame, sealing the plates before installing floor decking, and then going back to apply one bead to seal the top of the rim to the deck. This is not the way every framing crew likes to work, however.
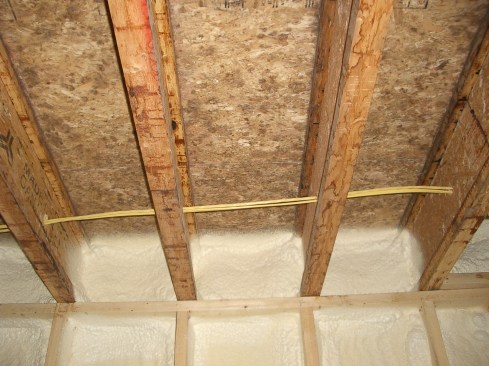
Fiberglass insulation is ineffective at blocking air infiltration at the band joist (or anywhere else).
This infrared image shows the ineffectiveness of fiberglass as an air seal.
A much easier and still very effective way to address the rim joist is to seal the entire area with closed-cell spray foam. It can be cost-effectively foamed to a 1-inch thickness (or in colder areas, to 2 inches) and insulated with batts (flash-and-batt), or insulated to a great depth to satisfy the entire code-required wall R-value. Even if you’re not insulating the wall cavities with foam, insulating the rim joist entirely with closed-cell spray foam is turning out to be a go-to solution for an increasing number of builders.
Spray foam makes an effective air seal at the band joist location.
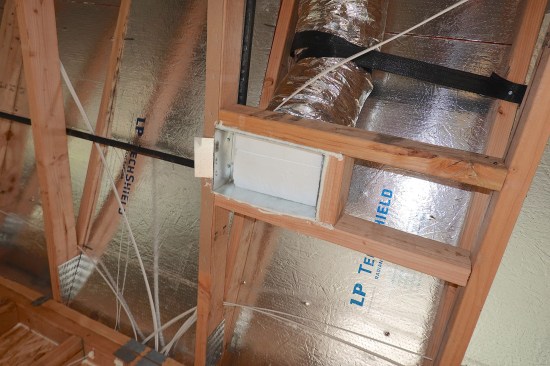
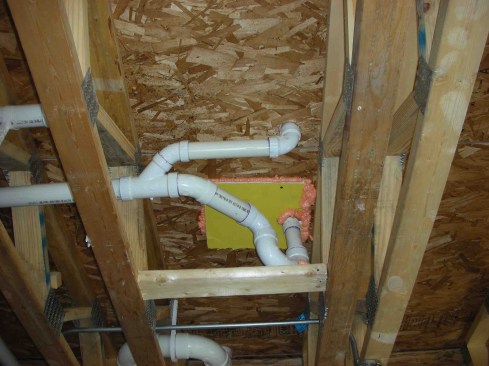
HVAC Penetrations
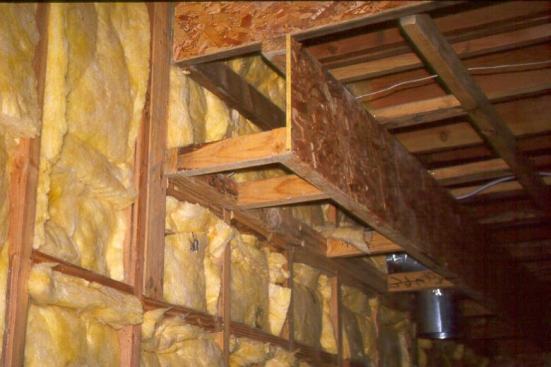
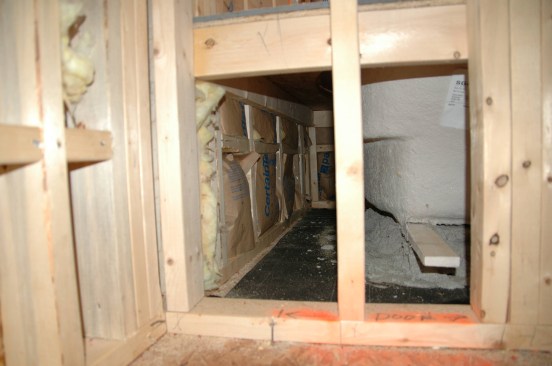
Vents and ducts passing through framing can lead to some large, significant leaks through the building shell. Many HVAC ducts and vents run through boxed-out framing chases and connect an equipment room at slab level, or a basement or crawlspace, with the attic.
This huge hidden hole will leak major amounts of air.
Plumbing
There are two serious leaks that builders miss time and time again. One is the bathtub drain over crawlspaces. It’s not uncommon for plumbers to overcut the floor sheathing to make ample room to glue up the drain trap. This happens not only in wood-framed floors but also in slabs: Where the slab is formed to fit the trap gets left as a wide-open hole under the tub.
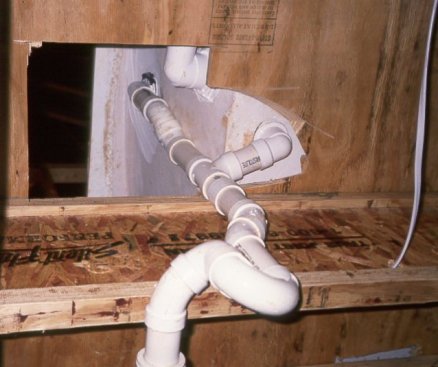
Gaping holes are often left under tubs, allowing huge amounts of air infiltration from the crawlspace below.
Here, the hole under the tub has been well sealed with rigid sheet material and gun foam.
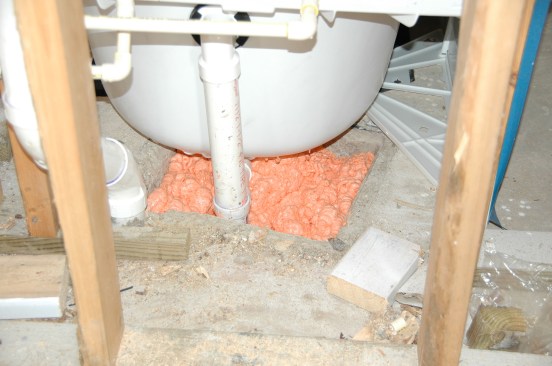
Holes in the slab that accommodate plumbing should also be filled and sealed.
The other place that is missed is the wall behind the tub. Unlike most of the wall in the bathroom, which is air-sealed with drywall or backerboard, the area behind the tub, or tub platform, is often left open. The solution is simple: Before the tub surround is framed in or the tub installed hard to the framing, the wall needs to be covered with a panel stock. This is required by code.
Here, the wall behind a tub has been insulated, but not air-sealed.
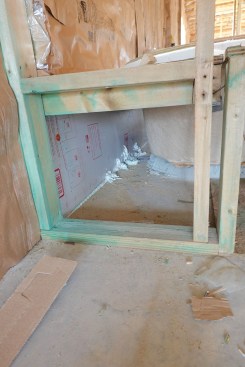
Code requires air-sealing the area behind the tub, as shown here.
Quality Assurance Key
Inspection before the insulation is installed is critical to success and avoiding callbacks. Also inspect the outside just before cladding to make sure the air barrier is airtight and watertight.
An inspection before insulation would have caught this big unsealed penetration.