Launch Slideshow

Image

Deck Ledger Flashing

Deck Ledger Flashing

  • Image

    http://www.builderonline.com/Images/tmp3CDC%2Etmp_tcm10-1014852.jpg

    Image

    600

    Harry Whitver

    1. On the Side

    Install housewrap and/or another air-moisture barrier (and perhaps a layer of self-adhering bituthene behind it) to create a first line of defense against water intrusion. Snap a chalk line to mark the top and bottom edges of the deck ledger board. Slit the housewrap along those lines and up a few inches at each end to create narrow flaps that will overlap the drip edges.
  • Image

    http://www.builderonline.com/Images/tmp3CDD%2Etmp_tcm10-1014860.jpg

    Image

    600

    Harry Whitver

    2. Add the Edges

    Fasten a continuous galvanized Z-channel under and along the entire length of the lower flap of housewrap. If you have to piece the channel, overlap the two sections at least 8 inches and caulk the joints. Use flashing tape to cover and seal the vertical end slips. Fasten a continuous 6-inch-wide, L- or Z-shaped galvanized metal drip edge 3 inches under and along the entire length of the upper flap (overlap and caulk joints, if necessary).
  • Image

    http://www.builderonline.com/Images/tmp3CDE%2Etmp_tcm10-1014868.jpg

    Image

    600

    Harry Whitver

    3. Install the Ledger Board

    Through-bolt a one-piece ledger board so that its bottom edge rests on the lower Z-channel and its upper edge meets the underside of the drip edge. Make sure the bolt heads will not intrude into the bottom edge of the drip edge. Bend the upper drip edge to at least a 90-degree angle, and tape the end-slits of the housewrap flap, allowing the length of the flap to rest unsecured over the drip edge.
  • Image

    http://www.builderonline.com/Images/tmp3CDF%2Etmp_tcm10-1014876.jpg

    Image

    600

    Harry Whitver

    4. Notch the Planks

    Cut 2-inch-square, ¾-inch-deep notches into the underside of the first deck plank (offset from the deck joists) to provide a secondary and incidental drainage avenue. Set the first plank(s) ? inches away from the house to allow drainage and ventilation. To avoid moisture wicking and an extra bit of drainage and ventilation, fasten the exterior cladding ½-inch up from the top of the deck planks.

There’s a reason so few builders and deck contractors properly flash deck ledger boards: It’s a pain. Not only do home buyers rarely inquire about or inspect such a spec, but by the time any latent defects from water and moisture penetration crop up (if they ever do), the builder’s warranty has long since expired.

If that’s your rationale, then good luck. But if you want to build to a higher standard, one that not only protects you from the cost of callbacks but also delivers a quality-built and durable house, then it might be worth a little extra time and training to get this detail right.

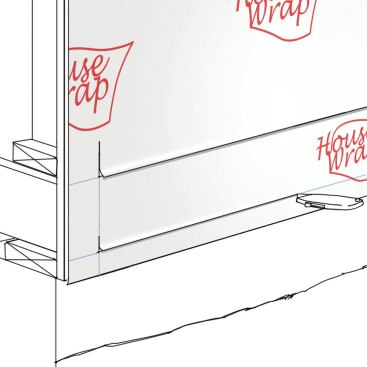
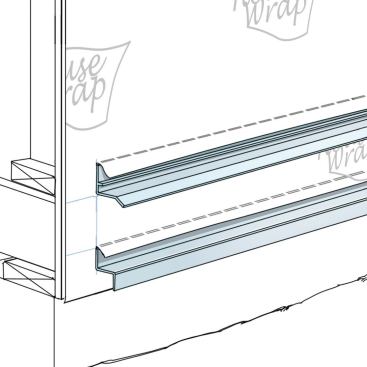
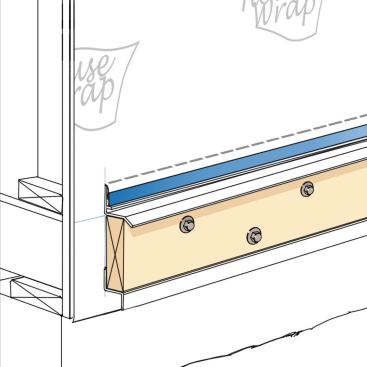
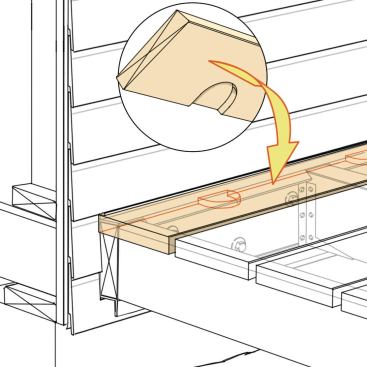
The goal is to divert runoff over the top of the ledger board instead of allowing water to get behind it. Like all flashing details, it requires a layered approach designed to shed water away from the home’s structural elements.