Slideshow: Flashing a Flanged Window with Housewrap and Flashing Tape
1 MIN READ
1
of 24
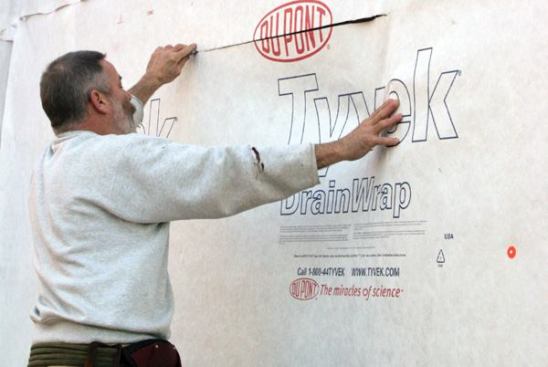
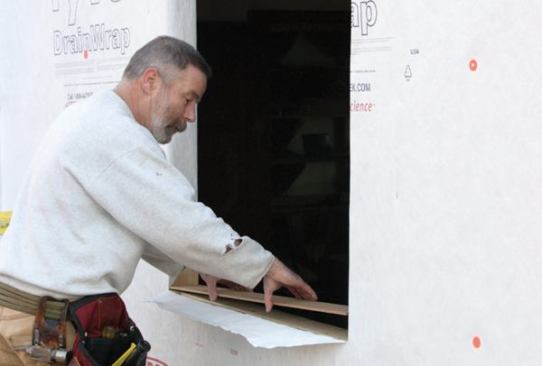
Cut the OpeningI start by making a level head cut in the housewr…
Cut the OpeningI start by making a level head cut in the housewrap…
…then slice two 45-degree cuts upward from the lower corners.
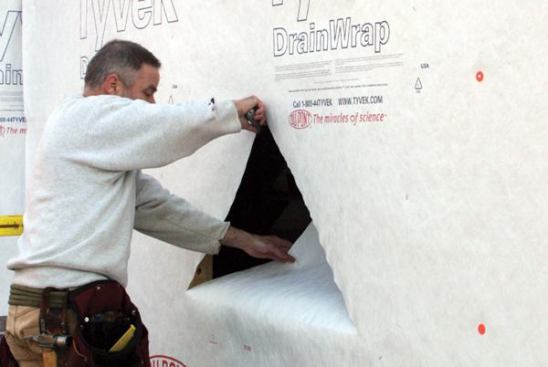
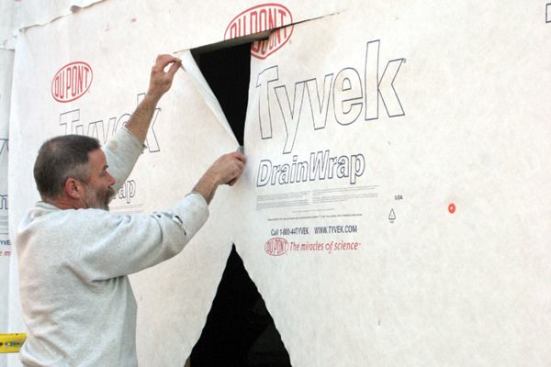
I finish with a vertical cut from the top down the middle.
Note…
I finish with a vertical cut from the top down the middle.
Note: Don't make an "X-cut" at the top; this will direct water into the structure.
Slope the SillI fasten a piece of beveled siding to the rough si…
Slope the SillI fasten a piece of beveled siding to the rough sill, with the thick edge toward the interior, to direct moisture outside.
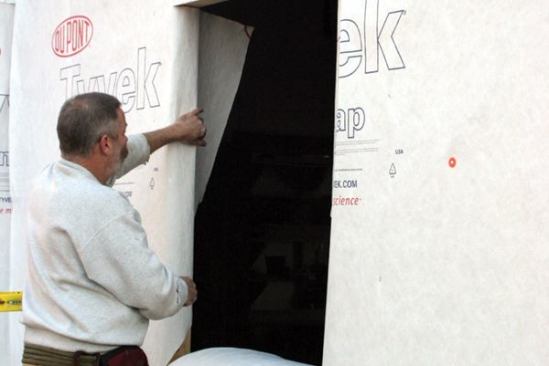
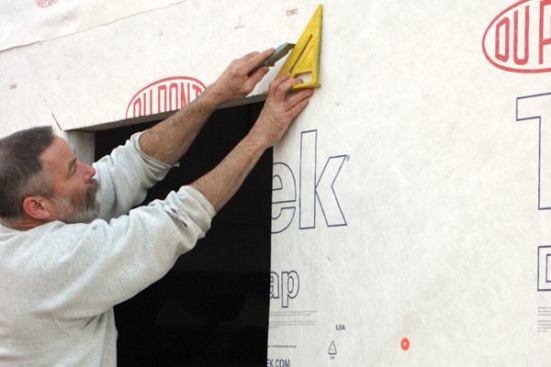
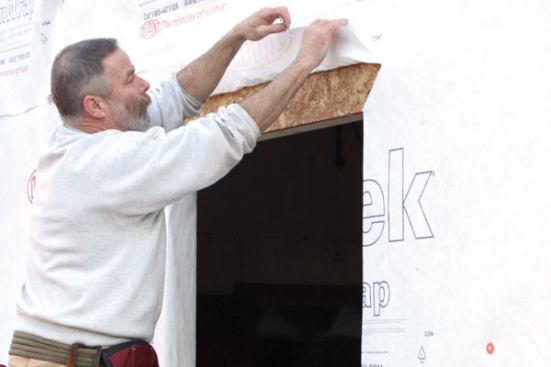
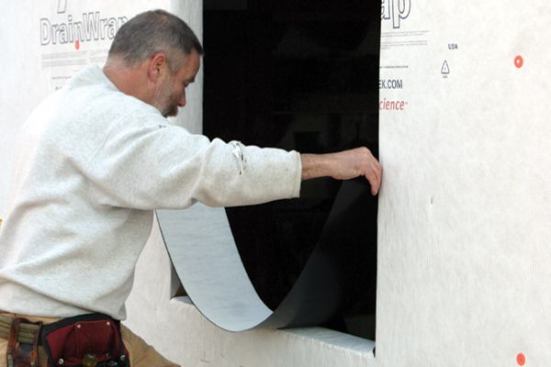
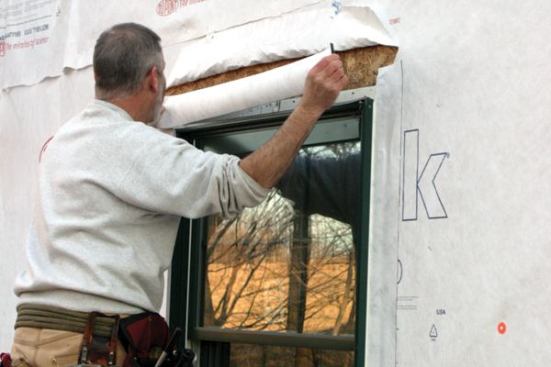
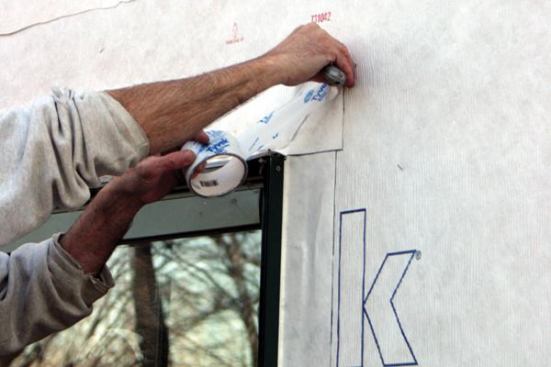
Prep the HeadI create a head flap by making two 6-inch-long 45-d…
Prep the HeadI create a head flap by making two 6-inch-long 45-degree cuts at the upper corners…
… then temporarily fold and tape the flap up out of the way.
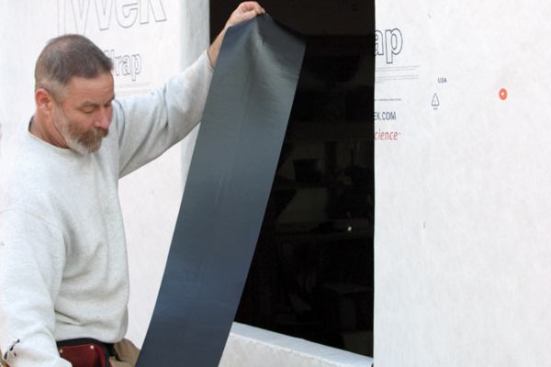
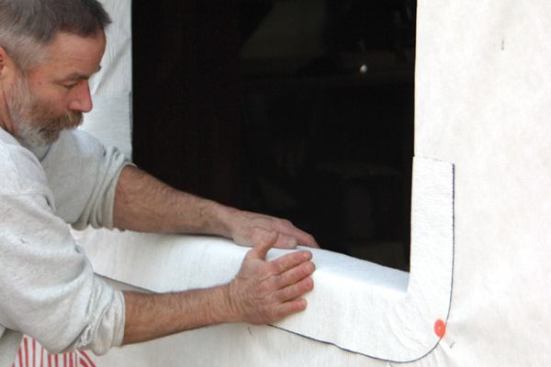
Flash the SillAfter taping the housewrap to the studs, I install…
Flash the SillAfter taping the housewrap to the studs, I install the sill flashing membrane, cutting it a foot longer than the width of the opening so it can extend up the jambs 6 inches.
Note: I prefer to use
Tyvek FlexWrap, a butyl-based flashing membane. It has the self-healing characteristics of generic peel-and-stick but can also be stretched to form seamless corners.
After removing the release paper, I make sure the membrane is ce…
After removing the release paper, I make sure the membrane is centered in the opening…
Note: Flashing membranes are meant to be installed at temperatures of 45 degrees or above. In colder weather, I keep the flashing in a warm place and cut pieces as I need them.
…then lower it onto the sill and press it into place, working …
…then lower it onto the sill and press it into place, working from the middle toward the corners.
Seamless CornerIn the corners, I carefully stretch the flashing …
Seamless CornerIn the corners, I carefully stretch the flashing out to create seamless protection.
The flashing has a memory, so to prevent it from curling back, I…
The flashing has a memory, so to prevent it from curling back, I drive a cap nail at the outer edge to hold it in place until the adhesive cures (24 to 48 hours).
Finally, I smooth the vertical portion of the flashing against t…
Finally, I smooth the vertical portion of the flashing against the housewrap.
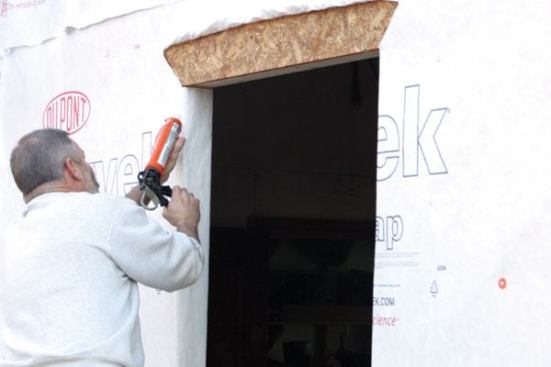
Caulk the OpeningBefore installing the window, I apply a heavy b…
Caulk the OpeningBefore installing the window, I apply a heavy bead of elastomeric latex caulk at the jambs and the head, but I never caulk the sill flange area.
Note: Should any moisture find its way into the rough opening, this caulk-free sill flange, coupled with the sloped sill, will provide a weep area for water to escape.
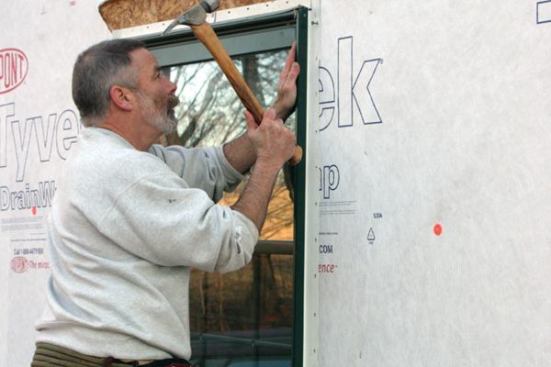
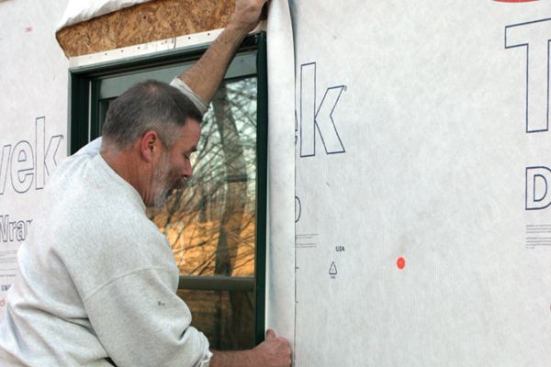
Install the WindowNext, I install the window, driving roofing na…
Install the WindowNext, I install the window, driving roofing nails through the preformed holes in the flanges, spacing them about 6 inches apart or per the manufacturer's directions.
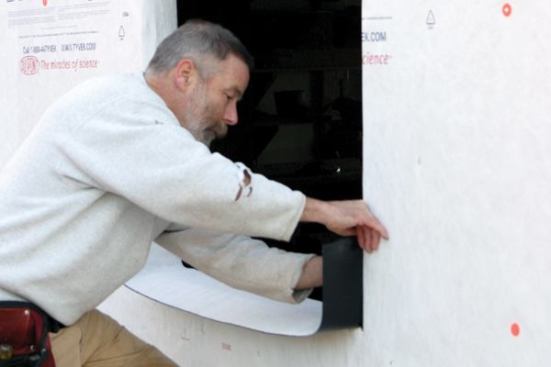
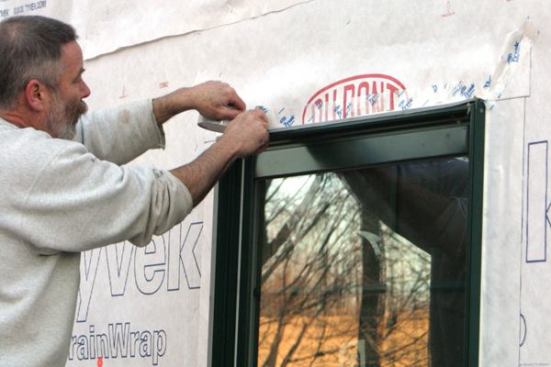
Flash the Jambs and HeadStarting 2 to 3 inches above the window …
Flash the Jambs and HeadStarting 2 to 3 inches above the window head, I apply flashing membrane over the jamb flanges, letting the tape extend at least to the bottom of the sill flashing.
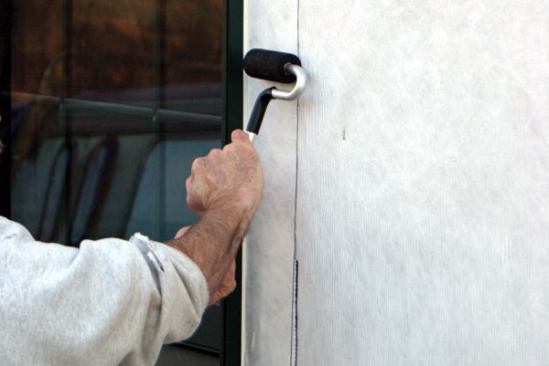
I always use a J-roller to apply strong, even pressure to the fl…
I always use a J-roller to apply strong, even pressure to the flashing tape.
Next I apply flashing over the head flange…
… lapping it over the top of the jamb flashings.
Note: Applyi…
… lapping it over the top of the jamb flashings.
Note: Applying the head flashing directly to the sheathing provides another level of protection. If any moisture were to find its way behind the housewrap and seep down to the window, it would encounter the head flashing and be directed over the windowhead flange, not behind it.
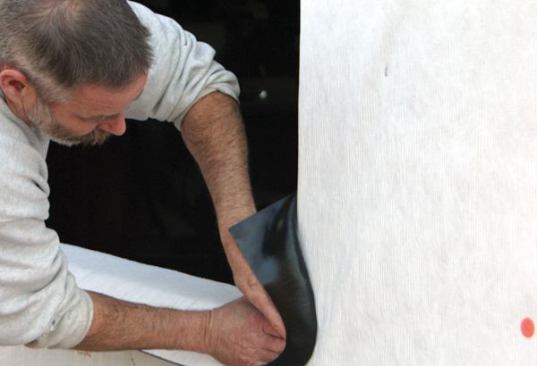
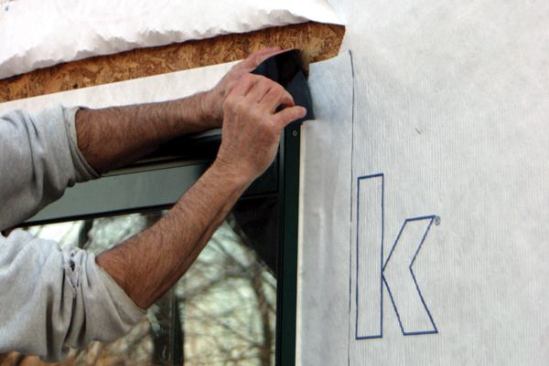
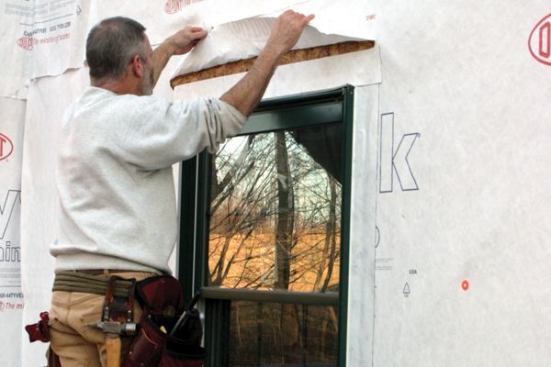
Lap the HeadOnce I've applied the head flashing,
I fold the housewrap flap down over it…
…then tape the 45-degree corners with housewrap tape.
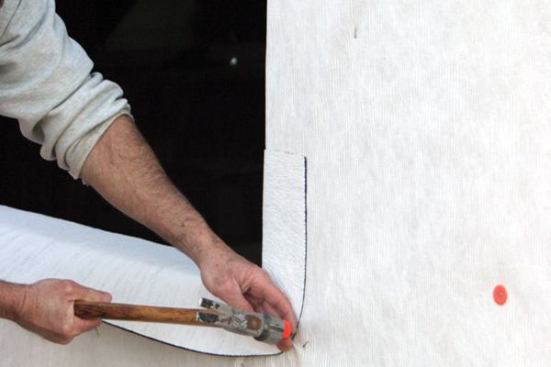
Skip-Tape the HeadI "skip-tape" (apply short pieces of…
Skip-Tape the HeadI "skip-tape" (apply short pieces of tape with gaps in between) the lower edge of the flap in place. Note: These skip-taped gaps act as weeps, giving any moisture that gets to the window head a way to escape.
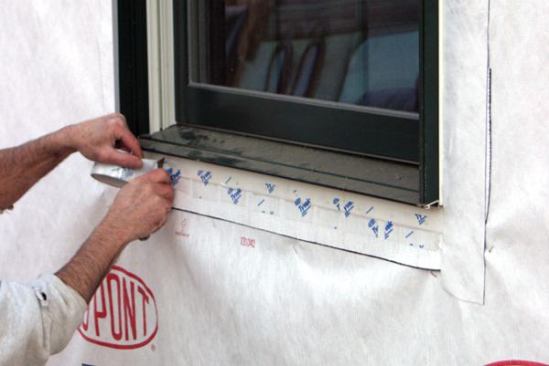
Skip-Tape the Sill FlangeI also skip-tape the bottom (uncaulked)…
Skip-Tape the Sill FlangeI also skip-tape the bottom (uncaulked) sill flange so that any moisture that gets in can weep out. Skip-taping also limits air leaks, though it's not entirely airtight.
There’s nothing like having a client call and tell you a window you installed is leaking. Ruined interior finishes and rotting framing are bad enough, but worst of all is the damage to your reputation as a skilled and reliable contractor.
However, if you follow the basics, you needn’t worry. In this slide show, veteran builder and JLC Live presenter Carl Hagstrom demonstrates the right way to install a flanged window unit by detailing the housewrap and flashing tape so that any water that gets behind the siding will drain safely to the outside.
Carl says, “Flashing windows properly isn’t difficult, and adds only about 15 minutes in labor and about $15 in materials per unit. As a builder, there’s nothing I do in one day that puts more dollars in a house than installing the windows. Spending a little extra time getting things right sure makes sense to me.”
To read the entire article as it appeared in JLC, click here.